Wednesday, October 27, 2010

Step by step to Christmas

Since we started stocking this new range of stamps from Personal Impressions, I've been dying to give them a try.
the stamps
This step-by-step Christmas card uses the 'Holly Christmas' set to make a simple but effective card. The beauty of cards like this is that you can stamp and colour whole batches of these images to set up a production line, simplifying the whole process and making it really easy to make all your cards this year.

inking
It's easier to take the inkpad to the stamp - especially if, like me, you are using an acrylic block that is bigger than your stamp.
Some acrylic stamps need conditioning before you use them. I didn't need to do it with these, but if you find that they are not stamping cleanly then lightly rub the stamp with fine sandpaper and clean with a wetwipe before using. This removes any residue from the production process so you can stamp a good clear image.

stamping
Stamp the image onto a separate piece of light cardstock - not your card blank.

background
These stamps work really well with standard 6x4 inch (10x15cm) card blanks. Cut a piece of background paper slightly smaller than the card, to leave a border. Ink the edge of the paper and stick it to the card.

add a layer
Trim your stamped image, ink the edge and adhere this to the background on your card.

stamping holly
Stamp another image on the same coloured cardstock as before. You'll need two of these, so go ahead and stamp another one as well. We only need the holly and berries so you don't need to ink the whole stamp up again, just ink the part you need.
Colour in the holly leaves using a dark green pencil.

pen only/pencil+pen
On the left is an image that's coloured using just a standard felt tip pen. On the right, the same image was coloured first with pencil, then a felt tip pen used over the top. You can see that this gives a much deeper green and better texture on the leaf. The shading in the centre of the leaf was achieved by lightly brushing the felt tip pen over the paper again. If you are too heavy-handed it can create ugly streaks, but do it gently and you can achieve subtle shading like this.

shading
Once you have coloured in the leaves, cut out this part of the image from the background. You don't need to colour the berries, we'll do them on the next layer.

decoupage
Use sticky pads or silicone to fix the leaves over the original image on your card.

berries
On your spare stamped image, colour in the berries using a bright red felt tip pen. Use a white gel pen to add highlights. Cut these out and use sticky pads or silicone again to create the top layer of your decoupage image.

tag
Take the greeting from this set, and stamp it onto a slightly darker shade of cardstock. Cardboard boxes and cereal packets are great for this kind of natural brown - you don't need to worry about materials being acid-free for cardmaking. Trim this into a rectangle and cut off two corners so that it looks like a luggage tag. Punch a small hole and knot some embroidery thread through it.

nearly finished
Ink the edge and use more sticky pads to adhere the tag to the card.

the complete card
And there you have it! Nice and easy to make, but it still looks great. Perfect for Christmas.

kate x

Saturday, October 16, 2010

Autumn crafting roundup

There's no denying it. Autumn is most definitely here. The mornings are colder, the evenings are darker and we've just put the heating on. It's disappointing to say goodbye to summer, but on the plus side - autumn means one thing for me: CRAFTING. Is there a better way to spend a chilly evening than wrapped up in wool as you make your latest project? Or a better thing to do on a cold weekend morning than getting out photos of summer to scrapbook? And it's definitely time to start making those Christmas cards. Here at Wightcat we've got plenty to keep you busy as the weather changes....

8x8 pop ups

These beautiful kits from Hunkydory are gorgeous. 8X8 is an unusual size, so they'll definitely stand out against all the others on the shelf! The decoupage is easy to do (nice sharp die-cuts) and creates a really thick, dimensional image.

P1110348web

Hunkydory have also made some brilliant Christmas card kits as well. I love the idea of the jumping boxes, and the Kinetic Cards look gorgeous. And who can resist the snowmen with their special snowdrift sparkles?

frosty sparkles

These clear stamps are a new range for us - and what a range it is! They have everything from Christmas, to beautiful scrolls and patterns, greetings and sentiments, and cute images. They're so new that I haven't had a chance to make any samples yet, but you can be sure I will!

We know you love these La Pashe Trinitage cards - so much so, that we've added some new designs as well.

If you like parchment craft, you might be interested in the latest from Christine Coleman
or our very own WightKitten Christmas card designs. As one half of this design team, I'm especially proud of these :)

If you want to add some texture to your cards this year - why not try some Flowersoft Ultra Fine? You don't have to use it with Flowersoft images - it's great for adding some extra depth to any stamped or pre-printed image.

flowersoft closeup

If your crafting is more yarn-based than paper, then Wightcat Wools can help you out there too!
Mindy has some great Christmas knitting patterns in stock, as well as plenty of patterns for you to make those Christmas presents for everyone. And with the weather turning colder, it's the perfect time to make something in Cygnet Grousemoor Chunky - our newest range.

I hope there's something there to inspire you...whatever you do, make sure your Autumn is a craft-filled one!

Kate x

Sunday, October 03, 2010

Introducing WightKitten


We are very excited here at Wightcat Crafts & Wools. Hilary & Kate have been busy designing...look what they've come up with! Its called Christmas Collection 1 by WightKitten. Its very nice!

Click here to go & buy the pattern

Saturday, October 02, 2010

Cards to treasure

It's no secret that I think Hunkydory card kits are great. The quality of the cards and die-cut decoupage is excellent, and they are so easy to put together.

They're also great value - these Treasured Moments kits are just £4.99 for a kit that makes four complete cards, and the Treasured Moments Companion Collection is just £6.99 and can make up to 12 cards.

I love seeing people's faces when you give them a card you've made yourself. And when it's this easy, everyone can have one!

Kate x

Thursday, September 30, 2010

Pop-ups with a twist

Pop-up cards always look stunning, but I always find the measuring and cutting quite complicated. These new trinitage pop-ups, though, make it so much easier.


There are just three layers of decoupage, separated with a simple tube. You can see a video about them here.


And of course, you don't have to create a pop-up card at all. You could use the decoupage images on any style of card you want.

So, for an easy way to impress people with your card-making construction skills, there are eight fabulous scenes to choose from here!

Kate x

Tuesday, September 28, 2010

Vamping it up: the twelve dames of Christmas


I'm always on the lookout for something different at Christmas. I think these lovely ladies fit the bill just perfectly. The Twelve Dames of Christmas are new die-cut decoupage from La Pashe, and I think they're just gorgeous. This sample represents Ten Lords a-Leaping, but all twelve are beautiful. There are two sets on each sheet, so here I've made a tunnel card and a straight-up A5 card using mirri card to mount it. Add a little bit of glitter on her outfit, and you're done.

I am definitely in the mood for Christmas now!

Kate x

Thursday, September 23, 2010

Something is growing...

In the garden, something is growing.


I find they multiply in warm places.


Ready to be picked and taken home.


Made using this wool, miniature pumpkins (with or without faces) are now available in the shop. They are not on the website but you can phone or email to order.

K x


Wednesday, September 08, 2010

Inspiration :: No. 3

We were out and about enjoying the sunshine at Ventnor Botanic Gardens, when we discovered an exhibion by the Vectis Quilters. Even if you don't quilt, you can't help but be impressed by the bright designs and colourful patterns.


Some of them were amazing geometric designs, while others were full of quirky details:

This one had the most amazing hand-stitching....someone obviously has a lot of patience! I love the effect of the variegated thread. (This is also the quilt used as the background on their homepage).


I have enough hobbies already, I don't need to start quilting. But there are definitely some ideas here for other projects with paper...
~ k ~

Friday, September 03, 2010

A perfectly finished piece


Most parchment work that Mum (that's Hilary) does is on cards or ATCs...running several workshops each month doesn't leave much time for creating anything else. So it's a change to see her making something that looks just perfect in a frame.
This lovely lady is full of delicate details and gorgeous 3-d flowers.

The frame is deep enough to let the piece sit perfectly without being squashed, but not so deep that you can't see the details. Beautiful!
~ k ~


Sunday, August 29, 2010

Work in progress

I'm not sure where August went?

Things have been pretty busy in the world of Wightcat...but now the weather is cooling and it suddenly seems like the perfect time to start some serious crafting again.

This is a work-in-progress, and it's from this book. We're even running a competition for you to win a copy - just make a card and send it to us, and every entry will be put a draw for a copy of the book. After the competition, the cards will be sold for charity, so please remember to include a blank envelope with it!

All styles and skill levels welcome - go on, give it a try!

kate x

P.S. I couldn't possibly take credit for the beautiful parchment work - as always, it's done by Hilary.

Monday, June 28, 2010

Inspiration:: No.2

cute enough to fit in my pocket


Owls are everywhere, aren't they?

K x

Wednesday, June 23, 2010

Quick and easy cards:: No.6

Q&E 6 web

Decoupage isn't just for girls! This card was also made using one of these great value 99p sheets. I've used a larger card blank (A5) and some more masculine backing papers. I've even restrained myself from using glitter this time - instead, I've inked the edges of my paper with my favourite Versamark in Jumbo Java. This baby is my go-to colour whenever I want a dark edging that isn't too heavy, but gives definition.

K x

Monday, June 21, 2010

Inspiration:: No. 1

inspiration from the ashmolean

What inspires you?

I spent the last weekend in May discovering that Mindy and I are both museum junkies....we spent many happy hours exploring the delights of Oxford, and the Ashmolean was a big highlight for me. Everything was beautifully displayed (and well lit - take note, Pitt Rivers museum) and I was allowed to take photos to my heart's content. I will definitely be taking inspiration from these in the weeks to come.

K x

Tuesday, June 15, 2010

Quick and easy cards:: No.5

Q&E 5 web

Die-cut decoupage is one of the easiest ways to create a stunning card in minutes. These sheets are just 99p and each one creates two toppers - great value. Here I have backed it with plain card and added a peel-off sentiment to finish it off. Perfect!

K x

Sunday, June 13, 2010

Recording my life, one scrapbook page at a time

fireworks double-page spread

Last year was somewhat 'scrapbook interruptus' for various reasons, mostly health-related. Which means that over the last few months I have had plenty of photos to work on, and it's been lovely to re-live some fantastic moments from 2009. It was a busy, fun-filled year and I have the photos to prove it.

Further proof, if any were needed, of my glitter obsession:

fireworks close up

K x

Friday, June 11, 2010

Quick and easy cards:: No.4

Q&E 4 web


Another quick card...this one I have left blank, just waiting for a sentiment to be added to the middle. Sometimes I make a load of cards that all say 'happy birthday' and then need something for another occasion - so I like to have a few cards like this sitting in my stash that can be adapted to suit.

Use a simple patterned background and then punch your butterfly out of contrasting papers. I've used some stickles glue to highlight the edges. I know, I love my glitter!

K x

Wednesday, June 09, 2010

I don't think he understands me

he approves, I think


Morpheus is my cat. I love him to bits, but I don't think he really 'gets' scrapbooking - other than as an endless source of bits of paper and ribbon to play with.

Sunday, June 06, 2010

Quick and easy cards:: No.3


Q&E 3 web

These embroidery stickers are technically for using with thread to create embroidered patterns on paper...instead, here I have used them to create some quick and beautiful embellishments for a simple card. Stick them on some fairly robust patterned paper, and then use something round (I use the blunt side of a pair of scissors) to curve the paper for a 3d effect. Position on a coloured background, and add some swirls with Stickles glitter glue. Easy!
K x

Friday, June 04, 2010

Sparkly scrapbook paper

using one sheet of double-sided paper


Would you believe that one sheet of double-sided scrapbook paper was enough to do 2 pages, a card and a tag?


collage page


I kid you not. So I had fun experimenting with some different styles.


clean lines with butterflies


These photos were taken exactly a year ago....life has changed so much since then. I have to say, though - short hair is so much easier to look after ;)


flower close up


This flower is part of the paper - just use a craft knife to cut around the petals and bend them slightly before you stick it to the page.


sparkle birdies


I didn't even need to add any extra sparkle to this one - all glitter is included!

K x

Tuesday, June 01, 2010

Need some inspiration with your kit?

If you have one of these kits from Hunkydory, you might be looking for inspiration...when I was putting together some samples for the shop, I noticed that there weren't a lot of images in the card kit itself. So, to help you - I've put together an idea sheet with some images of the cards I made. I hope it helps!


K x

Friday, May 28, 2010

Tip of the week

If you are embossing a straight line against a ruler it’s very easy using a Pergamano shader tool or PCA shader (holding it vertical), if you use a ball tool it can slip underneath the ruler if you are not careful.

Do you have any Crafting tips???

Send them in to us so we can share them we everyone, for every tip that we use, we will send you discount voucher for your next order when you shop with us (online or instore).

crafts@wightcat.com

Sunday, May 23, 2010

It's all hunkydory

These new card making kits from Hunkydory are fabulous. I'll admit that they're not my usual style, so when Mum asked me to have a go at making some samples I was dubious to say the least. But, I'll try anything once - so I took the kit home, and am I ever glad I did!

The kit comes with enough cardstock to make at least 8 cards, including 4 A5 size. By adding extra card blanks from my own stash I was able to make more than double that, and I even added some tags using the leftovers. The quality is amazing - the cardstock is thick and glossy, the die cuts are beautiful and the gold finish makes them look truly luxe. These are quality cards and even better - they are super-quick to put together. You'd never guess that I made most of my cards in one evening, would you?

And some close-ups of the details. I couldn't resist adding even more glitz with some Stickles glitter glue.

The die cuts include single butterflies, and two sets of pyramid decoupage:

And you get a whole sheet of matching sentiments to add a message to your card:

Please excuse the mess on my desk - I think I have some clearing up to do now!

K x

Thursday, April 22, 2010

Squares, repeated

in the gardens
I do scrapbook as well, you know!

Repeating a simple shape for a patterned effect works just as well on a larger scale as well as on cards. For this scrapbook page, I simply used a variety of co-ordinating scraps and arranged them in a grid pattern. I stamped on some of the squares to add a bit of variety. As you can see, the photo didn't quite fit in the grid so I added some brads down one side to balance everything out. The scalloped trim on top and bottom ties it all together.

I've just ordered a big batch of photos - there is so much of last year still missing from my scrapbooks. I'll have plenty more to share with you soon!

P.S. I use www.snapfish.co.uk for my prints - email me on katebucci@wightcat.com if you would like a referral :)

Monday, April 19, 2010

Quick and easy cards :: No. 2

Any punched shape, repeated in co-ordinating colours, is an easy way to create a stylish card. I particularly love this scalloped square, but any similar shape would do. A striking ribbon finishes it off nicely.

Do you know the simplest way to get your ribbon to look good? Instead of tying two ends of ribbon together to make a bow, lay one long piece of ribbon flat, take a shorter piece and tie around it. Much easier!

Friday, April 16, 2010

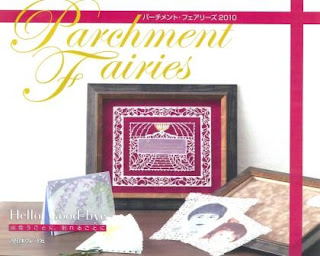
Do you believe in fairies?


This book is available to pre-order now, and will be with us (and you) in May. There are some beautiful designs in there and we are dying to get our hands on it!

Thursday, April 08, 2010

New Book - Parchment Craft, A Classic Collection

This new Parchment Crafts book will be published later this month and is now available for pre-order on our website www.wightcat.com


This 92 page book is ideal both for beginners and experts in the craft.
It contains parchment craft techniques, step-by-step instructions for embossing, lace making, 3D figures & painting in various mediums

Each project is accompanied by work descriptions, a large colour photo of the completed work, thumbnails enlarging various sections of every project & patterns printed in full size for easy replication

Clear and concise instructions help to ensure that even newcomers to this fascinationg craft can follow with ease. There are plenty of tips from the designers, a tools/materials conversion table & tricks on how to achieve perfect lace

Designers- Dorothy Holness, Julie Roces, Tatsue Shibata, Loes Laanen, Ria van der Ploeg, Akiko Shida, Robyn Cockburn, Carla Prediger Trasel, Trisha Liu, Kannikar Sukseree, Mary G Kerr, Ria Van Avondt and Patricia Murphy

A total of 32 patterns and a multitude of interpretations guarantees months of endless parching

Available from Pre-Order Now at Wightcat Crafts www.wightcat.com

Tuesday, April 06, 2010

A parchment peek...

Parchment peek

Hilary has been hard at work on the sample card for this week's parchment workshop.

I wish I had her patience!

Monday, April 05, 2010

A quick and easy card

a quick and easy card

Ever need a card in a hurry? I have been making a stash of quick and easy cards that I thought I'd share with you. Simple designs are the best!

For this one, all you need is some paper scraps. Cut into strips that are not quite as wide as your card blank, and around 1.5 inches high. The beauty of this card is that it doesn't matter if they are not even or exact.

Ink the edges of each strip. I find this makes such a difference and really makes your card look great. These chalk inks are great for this as the small pads are easy to handle and they dry quickly.

Arrange the strips on the card blank, deliberately making them slightly askew. This saves you having to line them up evenly. Use a strong pattern in the middle of the card, and choose two or three other papers to repeat, bringing the design together.

Layer some paper flowers together and secure them with a brad. Two or three flowers together gives a fuller effect. Secure these to the card. If you don't want to poke a hole in the card to put the brad through, just use a glue dot or some double sided tape instead.

Create your greeting. I like to use my own handwriting on a strip of co-ordinating cardstock. If you don't like your handwriting, you could use a stamp or a peel-off instead. Ink the edges of the cardstock strip and adhere to the card, tucking it behind the flowers. Of course, you could always leave the greeting blank and just fill it in when you're ready to use the card.

And there you have it! A quick card to use up your scraps.

LinkWithin

Related Posts Plugin for WordPress, Blogger...