Wednesday, April 29, 2015
Stamping Resist Techniques
Saturday, December 20, 2014
All things Christmassy!
Everyone is so busy in our household, Steve put up most of the decorations in the shop a while ago and Amanda decorated the tree at home last night so its all beginning to look very festive :)
Most of the presents are wrapped but if anyone has tried looking to see what is theirs, then they will be disappointed because none of them are labelled yet. I just hope I remember which is which when I attach all the labels otherwise it will be like a lucky dip!
I've finally made the labels and here they are just in case you still need a little inspiration ..... you could use any stamp that you have in your stash.
Make a background of your choice, I love using distress inks for backgrounds and using the little ink blending tool makes it so easy
Then flick a few water drops over the ink, you can just about see the water on the next picture, I used my fingers to flick the water, but you could use a spritzer bottle or old toothbrush
Friday, March 25, 2011
Lindsay Mason Clear Stamps
We’ve just updated our website with the complete range
Including some Mothers Day & Easter Sets...
Contemporary Easter
Monday, March 21, 2011
Clear Stamp Sets

------------------------------------------------------------------
Characters & Images

------------------------------------------------------------------
Occasions

------------------------------------------------------------------
Shapes, Scrolls & Patterns
www.wightcat.comWednesday, October 27, 2010
Step by step to Christmas
This step-by-step Christmas card uses the 'Holly Christmas' set to make a simple but effective card. The beauty of cards like this is that you can stamp and colour whole batches of these images to set up a production line, simplifying the whole process and making it really easy to make all your cards this year.
It's easier to take the inkpad to the stamp - especially if, like me, you are using an acrylic block that is bigger than your stamp.
Some acrylic stamps need conditioning before you use them. I didn't need to do it with these, but if you find that they are not stamping cleanly then lightly rub the stamp with fine sandpaper and clean with a wetwipe before using. This removes any residue from the production process so you can stamp a good clear image.
Stamp the image onto a separate piece of light cardstock - not your card blank.
These stamps work really well with standard 6x4 inch (10x15cm) card blanks. Cut a piece of background paper slightly smaller than the card, to leave a border. Ink the edge of the paper and stick it to the card.
Trim your stamped image, ink the edge and adhere this to the background on your card.
Stamp another image on the same coloured cardstock as before. You'll need two of these, so go ahead and stamp another one as well. We only need the holly and berries so you don't need to ink the whole stamp up again, just ink the part you need.
Colour in the holly leaves using a dark green pencil.
On the left is an image that's coloured using just a standard felt tip pen. On the right, the same image was coloured first with pencil, then a felt tip pen used over the top. You can see that this gives a much deeper green and better texture on the leaf. The shading in the centre of the leaf was achieved by lightly brushing the felt tip pen over the paper again. If you are too heavy-handed it can create ugly streaks, but do it gently and you can achieve subtle shading like this.
Once you have coloured in the leaves, cut out this part of the image from the background. You don't need to colour the berries, we'll do them on the next layer.
Use sticky pads or silicone to fix the leaves over the original image on your card.
On your spare stamped image, colour in the berries using a bright red felt tip pen. Use a white gel pen to add highlights. Cut these out and use sticky pads or silicone again to create the top layer of your decoupage image.
Take the greeting from this set, and stamp it onto a slightly darker shade of cardstock. Cardboard boxes and cereal packets are great for this kind of natural brown - you don't need to worry about materials being acid-free for cardmaking. Trim this into a rectangle and cut off two corners so that it looks like a luggage tag. Punch a small hole and knot some embroidery thread through it.
Ink the edge and use more sticky pads to adhere the tag to the card.
And there you have it! Nice and easy to make, but it still looks great. Perfect for Christmas.
kate x
Monday, August 13, 2007
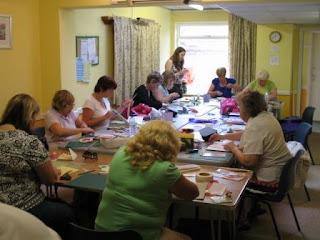
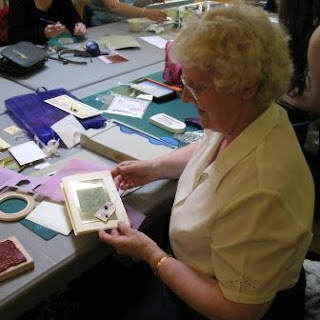
Cardmaking Workshop 28th July
In my workshop this month we had the theme of "Tags".
The room was packed to capacity, and it was a real hive of creativity, and noisy too with everyone throwing ideas around.
Everyone came up with fantastic cards!
We always have a laugh at the workshops!
I am sure everyone enjoyed themselves because I had lovely feedback
Here are some photos of the cards June made in the workshop- Brilliant!!
Next month we are making " Different Shaped" Cards....so a craft knife, craft mat and pointy scissors are the must have items for my next workshop.
For a list of our workshops click here
Saturday, October 21, 2006
Welcome to Wightcat Crafts
Wightcat Crafts is based in Newport, Isle of Wight, UK. We are a dedicated Craft shop specialising in Parchment Craft, 3d Decoupage, Scrapbooking, Altering and Stamping.
Our Design Team hold regular demo's and workshops, details of which will be posted here.