Wednesday, December 15, 2010

Hey Rudolph

rudolph


Christmas means crafting here in Wightcat Towers, and so I present - Rudolph. A crocheted cutie currently available in the shop (he's not on the website so please email me if you're online). He also has a few snowmen pals to keep him company.

I think Monday was supposed to be the busiest posting day for Royal Mail...we have certainly been kept busy with parcels of all shapes and sizes. Wightcat Crafts is open until midday on Christmas Eve, but don't forget that the last posting date for 1st class items in the UK is 21st December.

k x

Friday, November 26, 2010

Christmas Tree

Since putting my Ribbon Tree up in the shop window we've had lots of people asking about it so I thought I'd pop a few pictures up for you all to see...its really easy to make and you can do it with glittery ribbons like I did, or you could cut strips of pretty papers to use instead.

All you need is a Polystyrene cone ... (cones, & ribbons available from our shop). I painted the cone first, that way if you miss a few places it will still look pretty. Below, you will find a few simple instructions and if you need any help, just place a comment and we will reply.


Depending on how close you pin your ribbons you will need around 13-14 metres of ribbon. Cut these into 4 inch (about 10 cm strips). Very gently mark a line around the base of the cone about an inch up from the base....you can just about see it in the picture, then fold your ribbons and pin around the cone (I used 2 pins for each piece of ribbon)


Gradually work up the cone leaving about an inch between layers and finish with a little cone on the top (see finished tree picture)


Hope you enjoy making this, have fun :)
Hilary x


Tuesday, November 23, 2010

Hunkydory Glimpse of Glamour cards

glimpse of glamour

The newest offering from Hunkydory is these Glimpse of Glamour expanding tunnel cards.

glimpse of glamour

They use a cleverly folded side panel and sheets of acetate to create a layered image with amazing depth.

glimpse of glamour

They are 8x8 in size and look both complicated and expensive. They're neither. It's just £2.49 for a kit which contains everything you need to make two cards. And although they look difficult, they are pretty simple to make really. There's an instruction sheet in each pack. I was going to do a step-by-step tutorial but there were so many photos I ended up turning it into a little slideshow for you:

I quite enjoyed making this, but I have already seen lots of things I would like to improve! This is very much a first attempt at a slideshow tutorial, so please be kind. If you have any suggestions for future tutorials then I would love to hear them!

glimpse of glamour

There are two scenes in each pack and each one is a little scene of luxury. Like all the Hunkydory kits they are made of great quality cardstock with well-made die cut images.

glimpse of glamour

Enjoy!

Thursday, November 18, 2010

One stamp, two styles

one stamp, two styles

I love stamping, but I'm always on the lookout for ways to make my images look different. I thought I'd use the same stamps I made this card with to show you how to achieve two very different looks.

closeup - stazon on mirror card

Here, I've used the Christmas tree from the set and stamped it on mirri card using Stazon ink. You need to stamp carefully because the smooth surface of the card can cause the stamp to slide - place it on, press down and lift off straight to get a clean impression. It dries really quickly, and then I used Stickles glitter glue to create neat baubles. The greeting was stamped and embossed in blue - not a traditional Christmas colour but it contrasts nicely with the red on the tree.


closeup - copper embossing powder on brown

For the second card, I stamped the tree onto brown cardstock and embossed it using copper embossing powder. It has a much more rustic feel and catches the light nicely. I stamped the greeting on to a piece of paper from an old book to add to the vintage feel. String or raffia would have made a nice bow as well, but I settled for a neutral ribbon as that's what I had in my stash.

There you have it - two different styles using the same stamp. Happy crafting!

K x

Saturday, November 13, 2010

Christmas wreaths

09web

I love making Christmas decorations, and these wreaths are a crafty twist on a classic.

01web

I used this wool to wrap around a polystyrene base. The smaller base only needs around 30g of wool, so it's a great way to use up scraps. You'll need more if you use a thinner yarn.

02web

Use a pin to secure the first part of the yarn.

03web

Keep going around the ring, keeping the yarn tight. You might want to use a few extra pins to hold it in place, but you shouldn't need to put too many in. I used half a dozen for the whole ring.

04web

Because of the shape of the ring, you might need to pull the yarn a little tighter on the inside to make it lie smooth.

05web

Finish and secure with another pin. Tuck the end of the yarn in.

06web

Cut another piece of yarn and loop this around...this will be what you hang the wreath with. (You can use this to cover up any loose ends of yarn).

07web

Two colours of yarn are also effective - use traditional Christmas reds and greens, or go for something more unusual. My orange and yellow wreath is more autumnal than Christmassy, but it fits nicely with the colours in my house.

08web

And to decorate! I made 'flowers' by cutting three circles of felt, and stitching them together with a button in the middle. You could cut flower shapes, use buttons on their own, or use flowers made of silk or paper.

10web

I used curling ribbon to fill in the gaps between my flowers. Cut several short strips and tie them around the ring, then use scissors to 'curl' the ribbon.


11web

On my larger garland, I used crocheted flowers instead. These take a bit more effort to make but add to the rustic feel of this wreath. I used curling ribbon again, and the bow on the top is ribbon with a wire edge.

At the moment all the elements are secured with pins. Once I've decided that I'm happy with the placement, I'll use a glue gun to make sure they are well and truly stuck on.

Happy crafting!

Kate x

Thursday, November 04, 2010

Inspiration:: Amy Powers

If you want to get in the mood for Christmas, may I suggest:


I can't believe I have only just found this blog. The Christmas ideas e-zine is a work of art in its own right, but is also a fabulous source of inspiration for all things Christmassy. 170+ pages of beautiful projects with photographs, instructions and patterns. I love it!

Wednesday, October 27, 2010

Step by step to Christmas

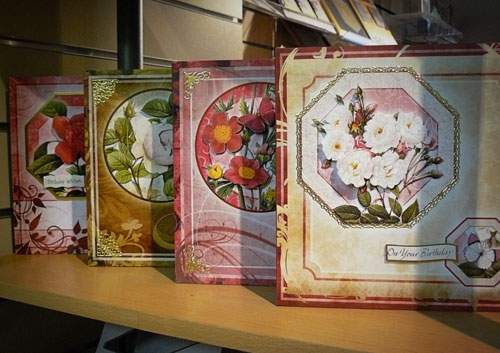
Since we started stocking this new range of stamps from Personal Impressions, I've been dying to give them a try.
the stamps
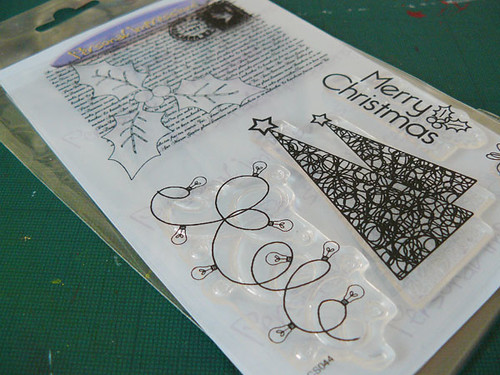
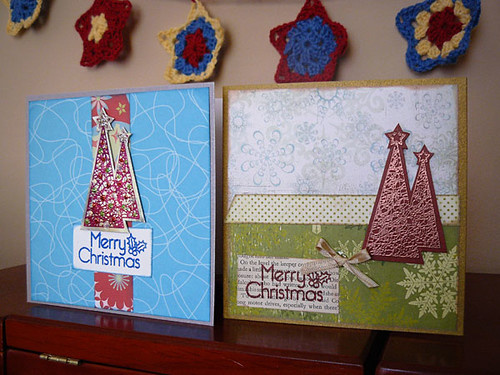
This step-by-step Christmas card uses the 'Holly Christmas' set to make a simple but effective card. The beauty of cards like this is that you can stamp and colour whole batches of these images to set up a production line, simplifying the whole process and making it really easy to make all your cards this year.

inking
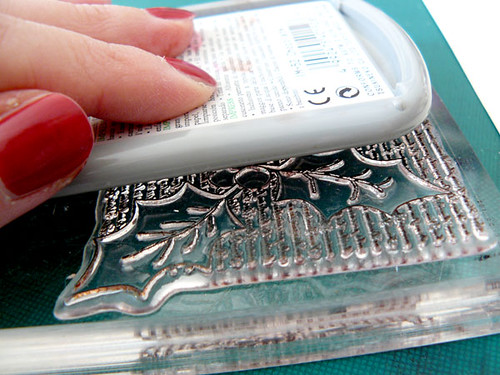
It's easier to take the inkpad to the stamp - especially if, like me, you are using an acrylic block that is bigger than your stamp.
Some acrylic stamps need conditioning before you use them. I didn't need to do it with these, but if you find that they are not stamping cleanly then lightly rub the stamp with fine sandpaper and clean with a wetwipe before using. This removes any residue from the production process so you can stamp a good clear image.

stamping
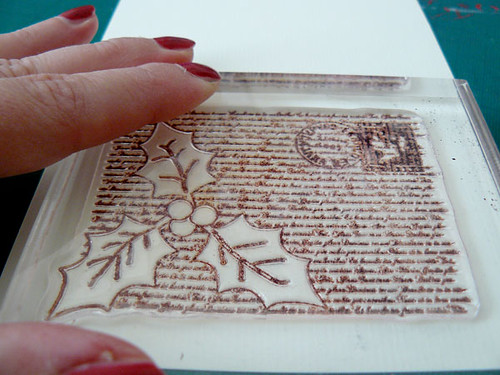
Stamp the image onto a separate piece of light cardstock - not your card blank.

background
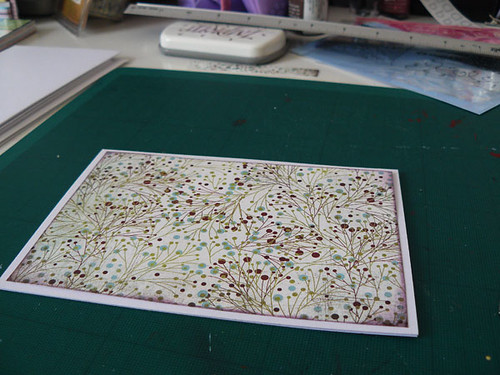
These stamps work really well with standard 6x4 inch (10x15cm) card blanks. Cut a piece of background paper slightly smaller than the card, to leave a border. Ink the edge of the paper and stick it to the card.

add a layer
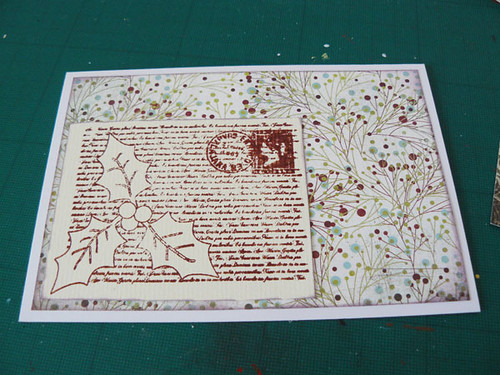
Trim your stamped image, ink the edge and adhere this to the background on your card.

stamping holly
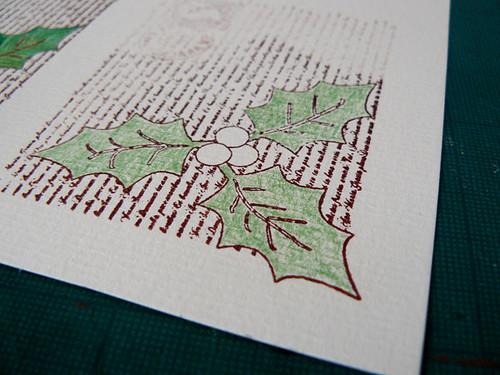
Stamp another image on the same coloured cardstock as before. You'll need two of these, so go ahead and stamp another one as well. We only need the holly and berries so you don't need to ink the whole stamp up again, just ink the part you need.
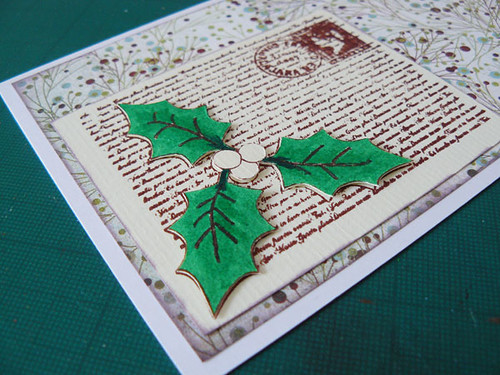
Colour in the holly leaves using a dark green pencil.

pen only/pencil+pen
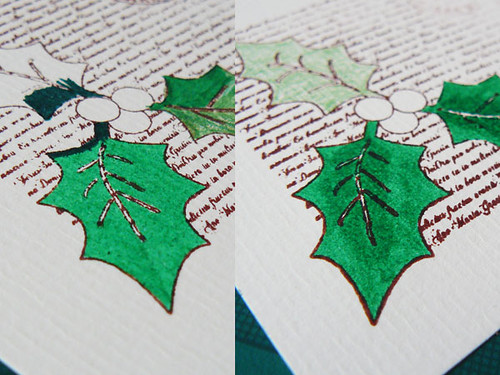
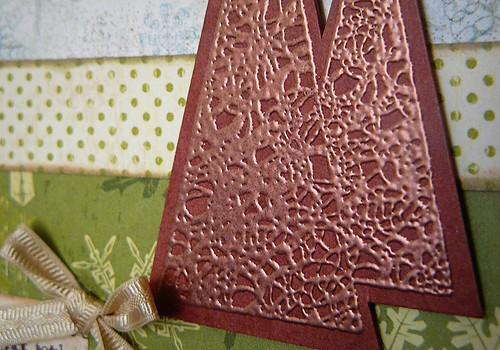
On the left is an image that's coloured using just a standard felt tip pen. On the right, the same image was coloured first with pencil, then a felt tip pen used over the top. You can see that this gives a much deeper green and better texture on the leaf. The shading in the centre of the leaf was achieved by lightly brushing the felt tip pen over the paper again. If you are too heavy-handed it can create ugly streaks, but do it gently and you can achieve subtle shading like this.

shading
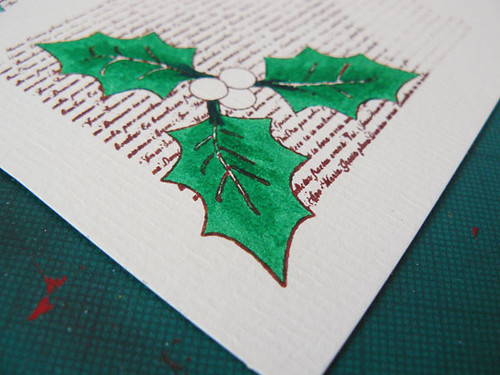
Once you have coloured in the leaves, cut out this part of the image from the background. You don't need to colour the berries, we'll do them on the next layer.

decoupage
Use sticky pads or silicone to fix the leaves over the original image on your card.

berries
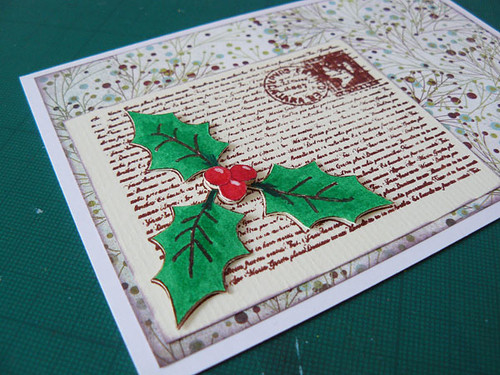
On your spare stamped image, colour in the berries using a bright red felt tip pen. Use a white gel pen to add highlights. Cut these out and use sticky pads or silicone again to create the top layer of your decoupage image.

tag
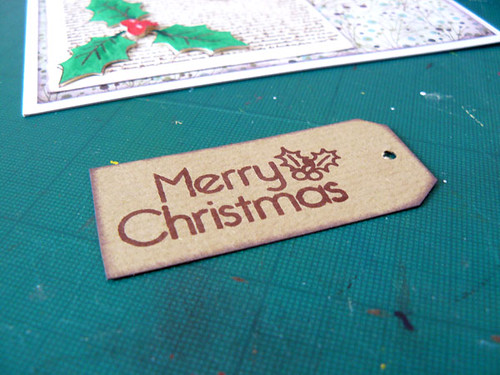
Take the greeting from this set, and stamp it onto a slightly darker shade of cardstock. Cardboard boxes and cereal packets are great for this kind of natural brown - you don't need to worry about materials being acid-free for cardmaking. Trim this into a rectangle and cut off two corners so that it looks like a luggage tag. Punch a small hole and knot some embroidery thread through it.

nearly finished
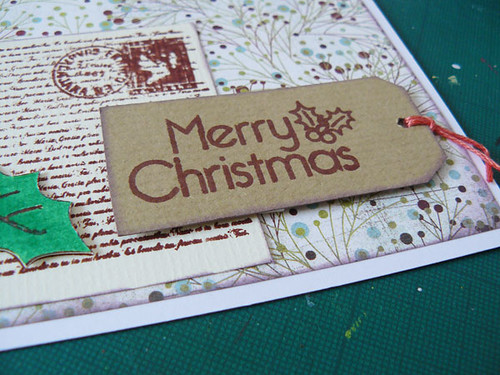
Ink the edge and use more sticky pads to adhere the tag to the card.

the complete card
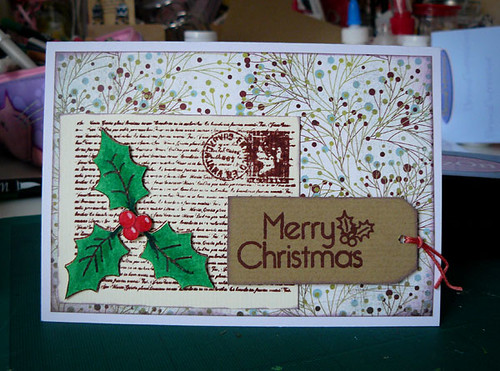
And there you have it! Nice and easy to make, but it still looks great. Perfect for Christmas.

kate x

Saturday, October 16, 2010

Autumn crafting roundup

There's no denying it. Autumn is most definitely here. The mornings are colder, the evenings are darker and we've just put the heating on. It's disappointing to say goodbye to summer, but on the plus side - autumn means one thing for me: CRAFTING. Is there a better way to spend a chilly evening than wrapped up in wool as you make your latest project? Or a better thing to do on a cold weekend morning than getting out photos of summer to scrapbook? And it's definitely time to start making those Christmas cards. Here at Wightcat we've got plenty to keep you busy as the weather changes....

8x8 pop ups

These beautiful kits from Hunkydory are gorgeous. 8X8 is an unusual size, so they'll definitely stand out against all the others on the shelf! The decoupage is easy to do (nice sharp die-cuts) and creates a really thick, dimensional image.

P1110348web

Hunkydory have also made some brilliant Christmas card kits as well. I love the idea of the jumping boxes, and the Kinetic Cards look gorgeous. And who can resist the snowmen with their special snowdrift sparkles?

frosty sparkles

These clear stamps are a new range for us - and what a range it is! They have everything from Christmas, to beautiful scrolls and patterns, greetings and sentiments, and cute images. They're so new that I haven't had a chance to make any samples yet, but you can be sure I will!

We know you love these La Pashe Trinitage cards - so much so, that we've added some new designs as well.

If you like parchment craft, you might be interested in the latest from Christine Coleman
or our very own WightKitten Christmas card designs. As one half of this design team, I'm especially proud of these :)

If you want to add some texture to your cards this year - why not try some Flowersoft Ultra Fine? You don't have to use it with Flowersoft images - it's great for adding some extra depth to any stamped or pre-printed image.

flowersoft closeup

If your crafting is more yarn-based than paper, then Wightcat Wools can help you out there too!
Mindy has some great Christmas knitting patterns in stock, as well as plenty of patterns for you to make those Christmas presents for everyone. And with the weather turning colder, it's the perfect time to make something in Cygnet Grousemoor Chunky - our newest range.

I hope there's something there to inspire you...whatever you do, make sure your Autumn is a craft-filled one!

Kate x

Sunday, October 03, 2010

Introducing WightKitten


We are very excited here at Wightcat Crafts & Wools. Hilary & Kate have been busy designing...look what they've come up with! Its called Christmas Collection 1 by WightKitten. Its very nice!

Click here to go & buy the pattern

Saturday, October 02, 2010

Cards to treasure

It's no secret that I think Hunkydory card kits are great. The quality of the cards and die-cut decoupage is excellent, and they are so easy to put together.

They're also great value - these Treasured Moments kits are just £4.99 for a kit that makes four complete cards, and the Treasured Moments Companion Collection is just £6.99 and can make up to 12 cards.

I love seeing people's faces when you give them a card you've made yourself. And when it's this easy, everyone can have one!

Kate x

Thursday, September 30, 2010

Pop-ups with a twist

Pop-up cards always look stunning, but I always find the measuring and cutting quite complicated. These new trinitage pop-ups, though, make it so much easier.


There are just three layers of decoupage, separated with a simple tube. You can see a video about them here.


And of course, you don't have to create a pop-up card at all. You could use the decoupage images on any style of card you want.

So, for an easy way to impress people with your card-making construction skills, there are eight fabulous scenes to choose from here!

Kate x

Tuesday, September 28, 2010

Vamping it up: the twelve dames of Christmas


I'm always on the lookout for something different at Christmas. I think these lovely ladies fit the bill just perfectly. The Twelve Dames of Christmas are new die-cut decoupage from La Pashe, and I think they're just gorgeous. This sample represents Ten Lords a-Leaping, but all twelve are beautiful. There are two sets on each sheet, so here I've made a tunnel card and a straight-up A5 card using mirri card to mount it. Add a little bit of glitter on her outfit, and you're done.

I am definitely in the mood for Christmas now!

Kate x

Thursday, September 23, 2010

Something is growing...

In the garden, something is growing.


I find they multiply in warm places.


Ready to be picked and taken home.


Made using this wool, miniature pumpkins (with or without faces) are now available in the shop. They are not on the website but you can phone or email to order.

K x


LinkWithin

Related Posts Plugin for WordPress, Blogger...